 SundayHK
原生WireGuard 没有Web UI界面,添加帐号不方便
https://github.com/wg-easy/wg-easy
环境
- 网关服务器:192.168.77.1、120.22.192.42
- 内网网段:192.168.1.0/24、192.168.2.0/24、192.168.77.0/24
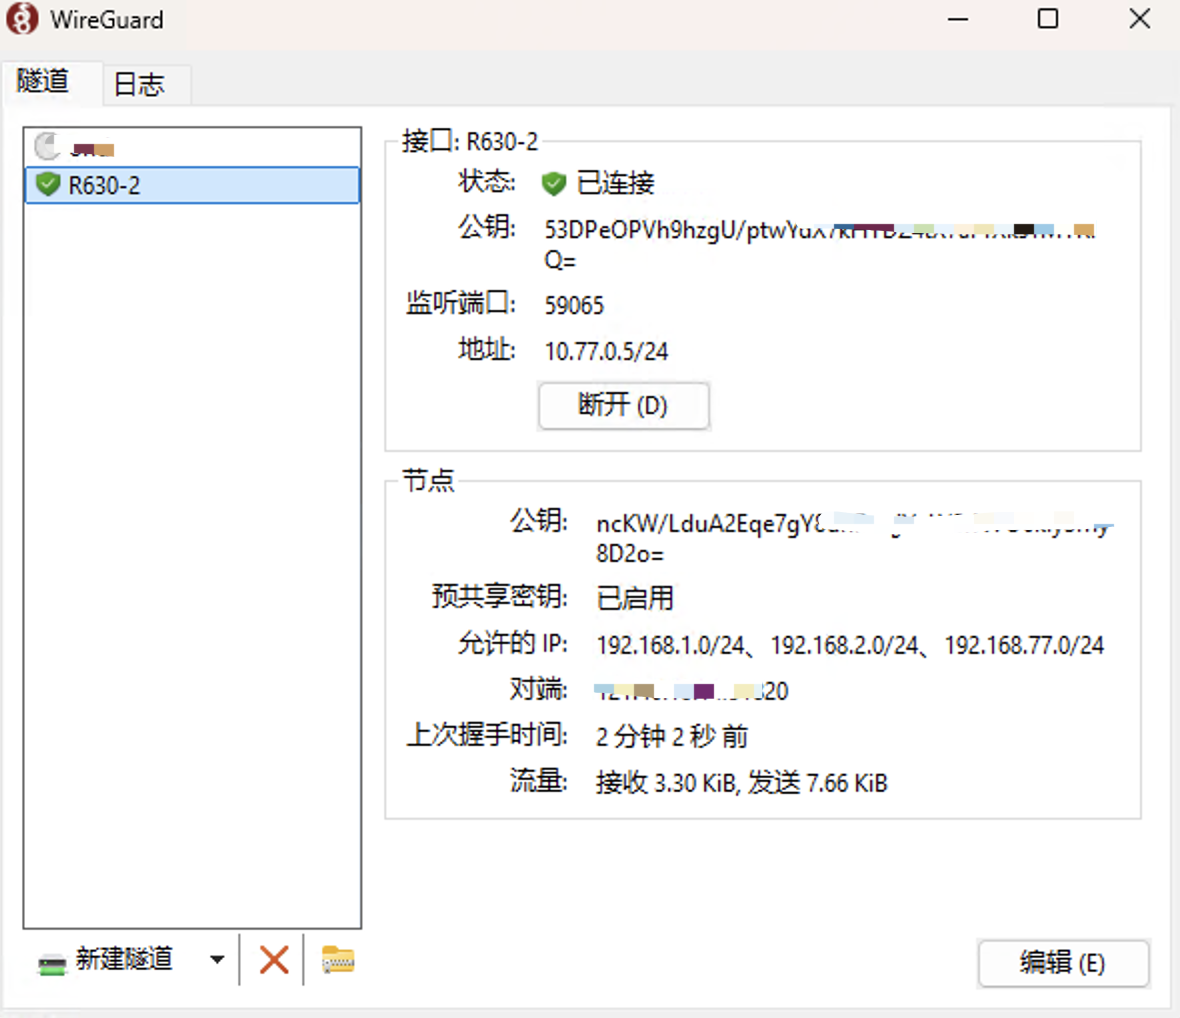
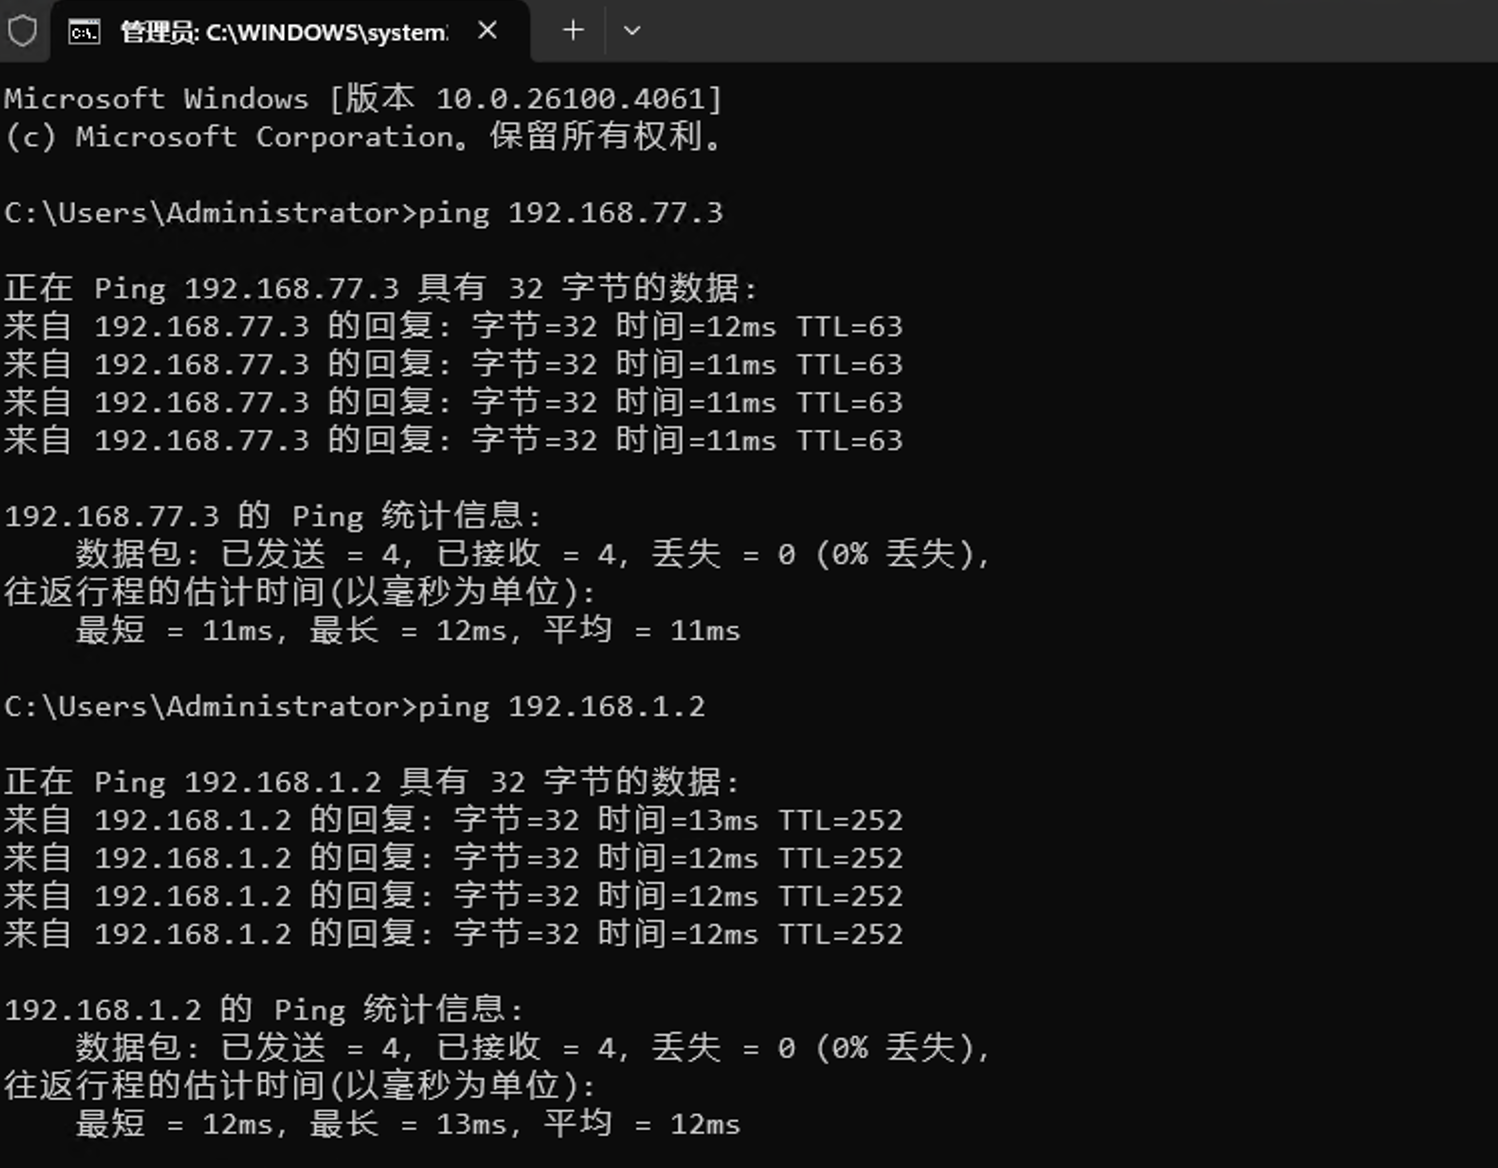
- 内网IP: 192.168.77.3
wg-easy 服务器无公网IP,流量是通过前面网关服务器做转发
网关服务器配置
如果你的WireGuard服务器没有公网IP,而是通过前置服务器进行转发,你需要在前置服务器上进行端口转发和网络地址转换(DNAT)配置。
网关端口转发
- 配置
iptables FORWARD 默认策略是DROP, 虽然可以修改ACCPET,但不推荐这样做
$ cat /etc/default/ufw | grep DEFAULT_FORWARD_POLICY
DEFAULT_FORWARD_POLICY="DROP"
# allow lan access Internet
iptables -t nat -A POSTROUTING -s 192.168.77.0/24 -o ens192 -j MASQUERADE
# allow wireguard forward
iptables -A FORWARD -p udp --dport 51820 -j ACCEPTubuntu 持久化
root@gw630:~# cat /etc/ufw/before.rules
#
# rules.before
#
# Rules that should be run before the ufw command line added rules. Custom
# rules should be added to one of these chains:
#   ufw-before-input
#   ufw-before-output
#   ufw-before-forward
#

# snat 需放在*filter前面
*nat
:PREROUTING ACCEPT [0:0]
:POSTROUTING ACCEPT [0:0]

# 允许内网可通过网关访问外部网络
-A POSTROUTING -s 192.168.77.0/24 -o ens192 -j MASQUERADE

# allow wireguard dnat
-A PREROUTING -p udp --dport 51820 -j DNAT --to-destination 192.168.77.3:51820

# Don't delete the 'COMMIT' line or these rules won't be processed
COMMIT # 这里不要忘记COMMIT

# Don't delete these required lines, otherwise there will be errors
*filter
:ufw-before-input - [0:0]
:ufw-before-output - [0:0]
:ufw-before-forward - [0:0]
:ufw-not-local - [0:0]
# End required lines

# 配置 wireguard 端口转发
-A FORWARD -p udp --dport 51820 -j ACCEPT
...
ufw disable
ufw enable
ufw reloadecho "net.ipv4.ip_forward=1" >> /etc/sysctl.conf
sysctl -p网关防火墙
ufw allow 51820/udpcat /etc/netplan/00-installer-config.yaml
network:
ethernets:
ens160:
dhcp4: false
addresses:
- 192.168.77.1/24
- 120.22.192.42/25
nameservers:
addresses:
- 223.5.5.5
routes:
- to: default
via: 120.22.192.1
version: 2root@wireguard:~# route -nv
Kernel IP routing table
Destination Gateway Genmask Flags Metric Ref Use Iface
0.0.0.0 120.22.192.1 0.0.0.0 UG 0 0 0 ens160
172.17.0.0 0.0.0.0 255.255.0.0 U 0 0 0 docker0
192.168.77.0 0.0.0.0 255.255.255.0 U 0 0 0 ens160wg-easy配置
docker-compose.yml
# source: https://github.com/wg-easy/wg-easy/blob/master/docker-compose.yml
version: "3.8"
services:
  wg-easy:
    environment:
      # ⚠️ Required:
      # Change this to your host's public address
      - WG_HOST=120.22.192.42 # 网关服务器IP

      # Optional:
      - PASSWORD=Sundayhk.com
      - WG_PORT=51820
      - WG_DEFAULT_ADDRESS=10.77.0.x
      - WG_DEFAULT_DNS=223.5.5.5
      # - WG_MTU=1420
      - WG_ALLOWED_IPS=192.168.1.0/24, 192.168.2.0/24, 192.168.77.0/24
        #- WG_PRE_UP=echo "Pre Up" > /etc/wireguard/pre-up.txt
        #- WG_POST_UP=echo "Post Up" > /etc/wireguard/post-up.txt
        #- WG_POST_UP=iptables -A FORWARD -i %i -j ACCEPT && iptables -t nat -I POSTROUTING -o eth0 -j MASQUERADE
        #- WG_POST_DOWN=iptables -t nat -D POSTROUTING -o eth0 -j MASQUERADE && iptables -D FORWARD %i eth0 -j ACCEPT
        #- WG_PRE_DOWN=echo "Pre Down" > /etc/wireguard/pre-down.txt
        #- WG_POST_DOWN=echo "Post Down" > /etc/wireguard/post-down.txt

    image: ghcr.io/wg-easy/wg-easy:13
    container_name: wg-easy
    networks:
      wg:
        ipv4_address: 10.77.42.42
    volumes:
      - .:/etc/wireguard
    ports:
      - "51820:51820/udp"
      - "51821:51821/tcp"
    restart: unless-stopped
    cap_add:
      - NET_ADMIN
      - SYS_MODULE
    sysctls:
      - net.ipv4.ip_forward=1
      - net.ipv4.conf.all.src_valid_mark=1

networks:
  wg:
    driver: bridge
    enable_ipv6: false
    ipam:
      driver: default
      config:
        - subnet: 10.77.42.0/24
注意: WG_DEFAULT_ADDRESS=10.8.0.x 中的x是任意,不要设置成数字
WG_HOST=xxx 需要修改为服务器的公网IP,云服务器可curl ip.sb查询
PASSWORD=xxx 设置dashboard管理密码
WG_ALLOWED_IPS=xxx 修改需要连通的网段,如192.168.1.0/24
docker compose up -droot@wireguard:~# route -nv
Kernel IP routing table
Destination Gateway Genmask Flags Metric Ref Use Iface
0.0.0.0 120.22.192.1 0.0.0.0 UG 0 0 0 ens160
10.77.42.0 0.0.0.0 255.255.255.0 U 0 0 0 br-9082351437f1
172.17.0.0 0.0.0.0 255.255.0.0 U 0 0 0 docker0
192.168.1.0 0.0.0.0 255.255.255.0 U 0 0 0 ens160
192.168.2.0 0.0.0.0 255.255.255.0 U 0 0 0 ens160
192.168.77.0 0.0.0.0 255.255.255.0 U 0 0 0 ens160wg-easy防火墙
wireguard连接上后,会发现无法连接ssh 192.168.77.3,这里需要额外放行wg-easy docker网段到192.168.77.3
# ufw allow 51820/udp # 下面已放行内网网段了
ufw allow in from 10.77.42.0/24 to 192.168.77.3
root@wireguard:~# ufw status
Status: active
To Action From
-- ------ ----
Anywhere ALLOW 192.168.77.0/24
Anywhere ALLOW 192.168.1.0/24
51820/udp ALLOW Anywhere
192.168.77.3 ALLOW 10.77.42.0/24wireguard服务器默认路由
wg-easy服务器 默认路由必须指向前置网关服务器,不然 ping不通 (重点)

这样配置后,前置服务器上的流量将通过端口转发被重定向到WireGuard服务器,而WireGuard服务器上的返回流量将通过NAT处理返回到前置服务器,再返回到原始的WireGuard客户端。确保你的前置服务器上的防火墙规则也允许WireGuard流量。
增加可访问网段


注意要添加访问网段所在网卡要做snat或MASQUERADE
如这里的192.168.1.0/24 在ens192网卡接口上,所以加多一条nat规则
然后在客户端AllowedIPs 添加多新的网段
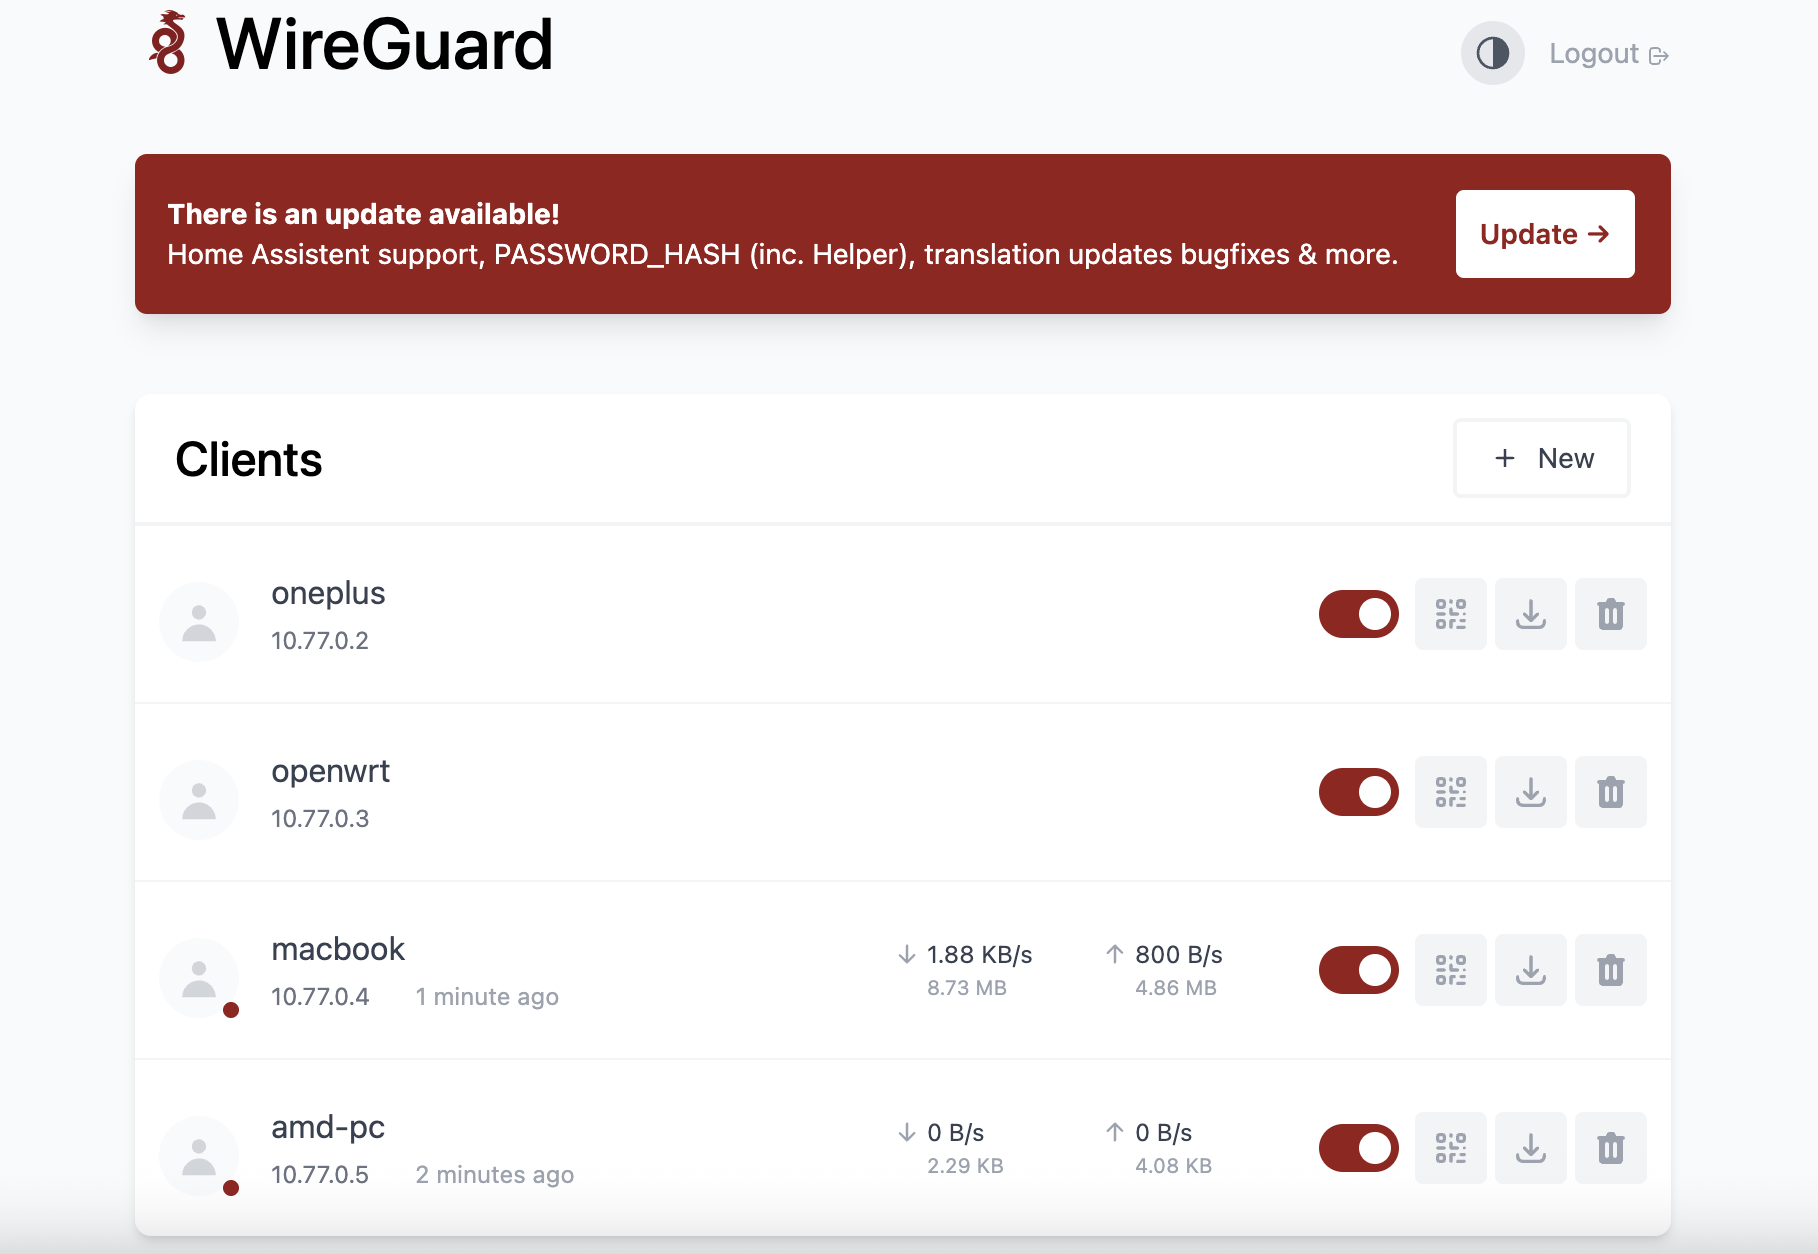
访问dashboard http://192.168.77.3:51821 (该IP为wg-easy服务器IP)
升级
docker comopose pull
docker compose up -d